







Building a small shed feels simple at first. Yet shed zoning rules can affect its size, location, height, base, and even the path used to bring materials into your backyard. A careful check before you order lumber can save weeks of changes later.
- Confirm your zoning district, lot lines, and shed size limits before choosing a shed model or buying materials.
- Measure setbacks from the real property line, not from a fence, hedge, patio, or neighbor's garden.
- Check for wetlands, protected trees, drainage paths, easements, and flood areas before placing a shed foundation.
Table of Contents
Start with your lot map and shed plan
Start by gathering a clear lot map, your property details, and a basic shed plan before you search local rules. You need the shed width, length, height, roof style, and planned location to get a useful answer from zoning staff.
Pull out the documents you already have first. Your closing papers may include a survey, plat map, site plan, or parcel number. If those papers are missing, look at your city or county property search page and enter your street address or parcel number.
A fence is not always on the lot line. This catches homeowners by surprise because a fence may sit inside the line, cross it slightly, or belong to a neighbor. Use a formal survey when the shed will sit close to a side or rear boundary.
Write down the shed details
Make a one-page note before opening a zoning map. Include the outside size, wall height, roof peak height, foundation type, door location, and distance from nearby boundaries. A 10 foot by 12 foot shed with an 8 foot wall and a 10 foot roof peak may face different rules than a low 6 foot by 8 foot storage box.
Also note what you plan to store inside. A shed used for garden tools is often treated differently from a workshop with regular business use, a guest room, a home office with client visits, or a space with plumbing. Keep your use simple and honest when you ask questions.
Check the ground before choosing a corner
Walk the backyard after rain if you can. Look for standing water, a low dip in the lawn, downspout outlets, drainage swales, large tree roots, and soil that stays soft. These signs can point to an area where a shed may block water or harm a protected part of the lot.
When we tested this setup on a damp backyard site, the best-looking corner was also where roof water collected after a storm. Moving the plan just 8 feet gave the shed firmer ground and kept the drainage path open. Small changes are much easier before the base goes in.
- Parcel number or street address
- Lot survey or plat map
- Shed width, length, and height
- Planned shed use and foundation type
- Photos of the proposed backyard area
- Rough measurements to fences, homes, trees, and water areas
How do you find the zoning district and local rules?
Find your zoning district through the city or county parcel map, then read the rules for accessory buildings in that district. The zoning code should list setback distances, height limits, lot coverage limits, permit needs, and special environmental areas.
Start with the official planning, zoning, building, or land use website. Search your address, then write down the district code shown on the parcel page. Common codes may look like R-1, R-2, RS, or a similar local label, but the letters mean different things in different places.
Next, search the local code for words such as “accessory structure,” “detached accessory building,” “storage shed,” “rear yard,” and “setback.” Read the full section, not only a short web summary. A summary may say small sheds are allowed, while the full rule explains that they cannot sit in an easement or near a wetland buffer.
Read the rule in the right order
Begin with the rule for your main zoning district. Then check separate sections for flood areas, tree rules, stormwater rules, historic areas, homeowner group rules, and utility easements. A shed can meet the basic district rule but still fail one of these extra checks.
Look for the rule that sets the shed height. Some areas measure height from finished ground to the roof peak, while others use the average roof height. If you raise the shed on blocks or a tall gravel pad, that added height may matter.
Lot coverage is another common limit. This is the amount of your lot covered by buildings and hard ground such as patios or driveways. For example, a 6,000 square foot lot with a 40 percent coverage limit may allow up to 2,400 square feet of covered or hard area, depending on local wording.
Keep a copy of the rules you use. Save the web page as a PDF, take a screenshot, and note the date. Rules can change, and a saved copy helps you explain what you checked when you speak with a permit worker later.
Water features need extra care. Our guide to wetland setback rules explains why a narrow stream, pond edge, or tree area can create limits beyond a normal rear-yard setback.
Measure setbacks, buffers, and site limits
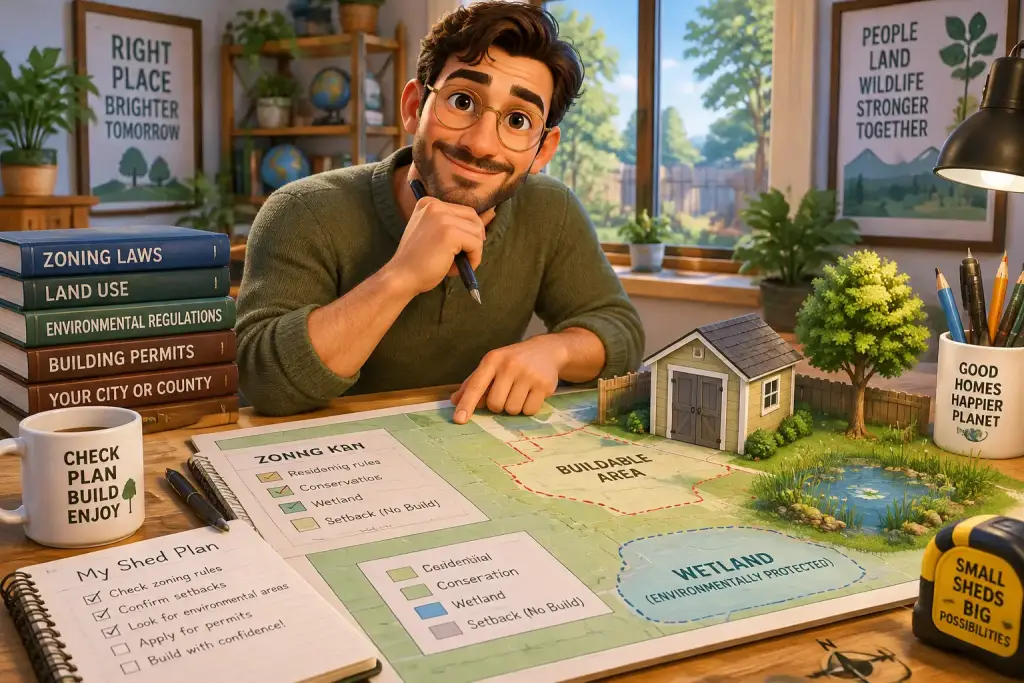
Measure every required setback from the true property line to the nearest part of the shed. Then check for wider limits from wetlands, streams, protected trees, drainage areas, easements, and flood zones before marking the final shed corners.
Setbacks are open spaces that local rules require between a structure and a property line, road, or other feature. A rear setback might be 5 feet for a small shed, while a side setback may be 3 feet. Do not guess from a map image because online parcel lines can be off by several feet.
Use a long tape measure for short runs and a measuring wheel for larger yards. Measure from the survey pin or clear survey line when possible. If you cannot locate the line with confidence, place the shed farther inside your lot or ask a licensed surveyor for help.
| Check area | What to measure | Useful tool or record |
|---|---|---|
| Side and rear setback | Lot line to nearest shed wall | Survey and 100 foot tape |
| Shed height | Finished ground to roof peak | Plan drawing and level |
| Wetland buffer | Water edge or marked buffer to shed | Local environmental map |
| Utility easement | Easement edge to shed base | Plat map or utility record |
| Lot coverage | Existing and new covered area | Site plan and calculator |
Check environmental limits on the same map
Environmental rules may be shown on a separate map layer. Turn on layers for floodplain, wetlands, streams, protected habitat, steep slopes, tree protection, and drainage when your local map offers them. A blank parcel map does not prove that no limit exists.
Look closely at trees near the shed site. Some towns protect trees above a certain trunk width, often measured about 4.5 feet above the ground. A shed may be allowed near a tree, but digging, grading, or placing heavy gravel over roots can still cause a problem.
Keep rainwater moving away from your home and neighboring lots. A shed roof can send a large amount of water into one spot during a heavy storm. Plan gutters, a splash block, or a small gravel strip if local rules allow it, and never direct water toward a neighbor’s fence.
If you hope to add flowers around the shed, choose the final building spot first. A small pollinator garden plan works better when it does not block drainage access, utility work, or required open space.
Do small backyard sheds need a permit?
Small backyard sheds may not need a building permit, but they can still need zoning approval or must follow zoning rules. Never treat a permit exemption as permission to ignore setbacks, height limits, environmental buffers, or homeowner group rules.
Local permit rules often use shed size as the first test. A town may exempt a one-story shed under 120 square feet, while another may use 200 square feet or a different number. The rule can also change if the shed has electricity, plumbing, a permanent foundation, or a taller roof.
Call or email the planning and building office after you read the online rules. Give them your address, zoning district, shed size, shed height, and the distance from each lot line. Ask for a written reply when possible, then save it with your site sketch.
Ask clear questions in one message
A short, complete message gets better results than a vague question. Avoid asking, “Can I build a shed?” Instead, describe the exact plan and request the rule section that applies. This helps staff see if a special review is needed.
- State your address and parcel number.
- Give the proposed shed width, length, wall height, and roof peak.
- List the planned distances from side and rear lot lines.
- Ask about permits, setbacks, lot coverage, easements, trees, and water areas.
- Attach a simple marked site sketch and two backyard photos.
For example, write: “I plan a 10 foot by 12 foot tool shed, 9 feet high at the roof peak, on a gravel base. It will sit 6 feet from the rear line and 5 feet from the side line. Please confirm the needed permits and any limits for drainage, trees, or easements.”
Do not forget private rules. A homeowner association may limit shed color, roof material, visibility from the street, or fence placement. Those private rules do not replace city zoning, and city approval does not replace the homeowner association review.
Plumbing creates a separate set of questions. A shed with a sink, drain, or outdoor wash area may need more checks for wastewater and water lines. Review our guide to greywater safety checks before connecting any water system near the shed.
Place small flags at the four planned shed corners before asking the zoning office a question. A clear site sketch with measurements usually brings a faster and more useful answer.
Fix the common shed zoning slip-ups early
Fix shed zoning problems before construction by moving the site, reducing the shed size, lowering the roof, or changing the base. Early changes are usually cheap, while a finished shed that breaks a rule may need costly removal or a formal approval request.
The most common error is measuring from a fence instead of the property line. A second common error is using the shed kit size while forgetting roof overhangs. Some rules measure to the outer roof edge, so a 10 foot shed with a 12 inch overhang can take up more space than expected.
Another issue is the base. A shed on simple skids may be treated differently from one on a concrete slab, but this depends on local wording. A thick gravel pad, retaining edge, or raised platform can also affect drainage and height measurements.
Use a simple fix for each issue
If the setback is too small, shift the shed inward before changing the whole design. Even a move of 2 or 3 feet can solve the problem. Mark the new spot with string and flags, then walk around it with the door open to make sure the space still works.
If a protected tree sits close by, reduce digging and keep heavy materials away from the root area. A smaller shed or a different yard corner may be safer than cutting roots. Do not assume a dying branch or leaning tree gives permission to remove it.
If the lot coverage limit is tight, choose a smaller footprint rather than hoping it will not matter. A vertical storage plan with wall hooks and shelves can make an 8 foot by 10 foot shed work well for tools, bikes, and garden supplies. Bigger is not always better.
Watch for access problems too. A shed might fit on paper but be hard to install without crossing a neighbor’s land or damaging a protected area. In everyday use, this check takes about five minutes: walk the path from the gate to the planned site while noting narrow turns, roots, and slopes.
Do not rely only on advice from a shed seller, neighbor, or social media post. Their rules may come from another town, another zoning district, or an older code. The local planning office and current written rules are the better source for your lot.
Keep proof that your shed site still works
Keep a simple file with your site sketch, measurements, photos, zoning notes, permits, and office replies. This record helps you build in the approved spot, answer questions later, and avoid problems when you repair, sell, or replace the shed.
Before work begins, place stakes at the four outer corners of the shed. Recheck each setback from the real lot line, not from the stake placement you remember. Take photos showing the tape measure and the marked corners, especially when the shed sits near a limit.
Check the site again after the base is built. Gravel can spread wider than planned, and a concrete form can shift during setup. Confirm that the shed, roof overhang, gutters, and drainage parts will remain inside the allowed area.
Use a short build-day check
On build day, compare the finished work with your approved sketch. Check the roof peak height, the door swing, gutter direction, and the space around the shed. Make sure rainwater will not flow into an easement, toward a wetland edge, or onto a neighboring lot.
Walk the area after the first strong rain. Look for pooled water beside the shed, soil washing from the base, or water running toward the home. Fix small drainage issues quickly with approved grading, a gutter extension, or a gravel channel that keeps water on your own property.
Store your records in both paper and digital form. Name files clearly, such as “shed site plan,” “zoning email,” and “final measurements.” If a future buyer, inspector, or neighbor asks about the structure, you can show that you checked the rules before building.
A well-placed shed should feel quiet and ordinary once it is done. That is the goal: enough storage for daily life, clear space around the structure, healthy drainage, and no surprise letter asking you to move it later.

Letizia Neri
Founder & Environmental Zoning EditorLetizia Neri, born and based in Roma, Italy, is the founder and lead editor of Eco Zoned. She helps homeowners understand local environmental zoning rules through practical, plain-language advice for planning projects and making informed property decisions.