









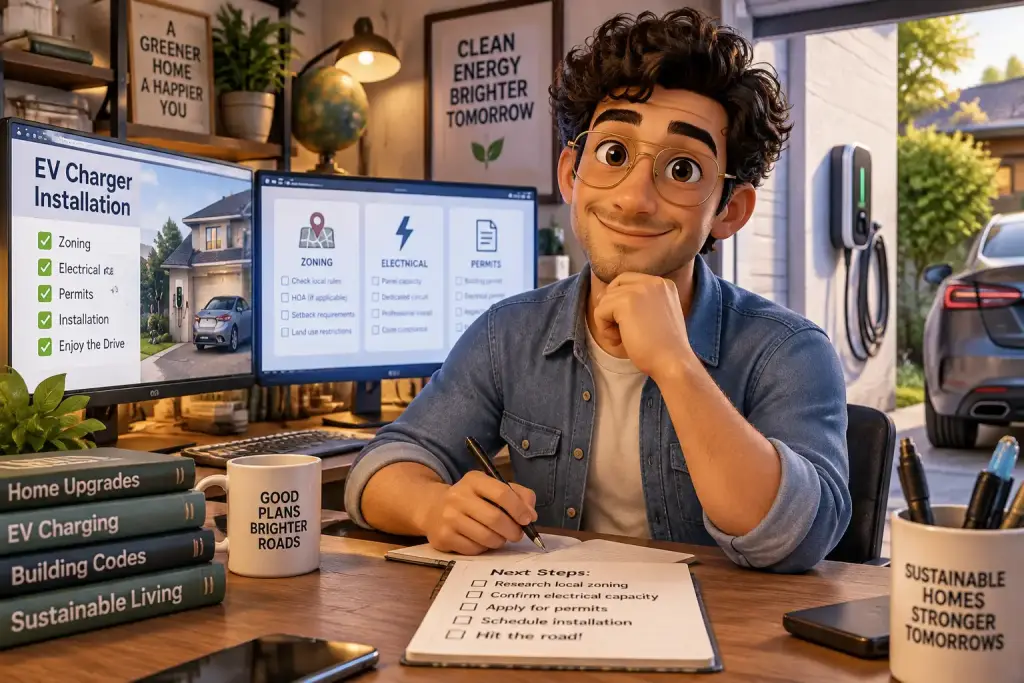
Have you noticed that an EV charger can seem simple until you look at your garage panel, driveway, and local rules? It does not have to stay this way. A short check of your parking space, electrical service, zoning rules, and permit office can prevent a costly move later.
- Check local zoning, HOA rules, and permit needs before buying an EV charger or paying for electrical work.
- Ask a licensed electrician for a load calculation before adding a Level 2 charger to an older service panel.
- Keep permit papers, inspection records, photos, and charger details for future home sales or repair work.
Table of Contents
- Start Your EV Charger Plan in Five Minutes
- How Do Zoning Rules Affect a Home EV Charger?
- Match the Charger to Your Electrical Panel
- What Permits Do You Need for an EV Charger?
- Plan the Charger Location, Wiring, and Daily Use
- Work With the Electrician and Inspector Effectively
- Keep Your Home Charging Setup Ready for the Years Ahead
Start Your EV Charger Plan in Five Minutes
Start by taking five minutes to check where your car parks, where the charge port sits, and where your electrical panel is located. This quick check helps you spot cable length problems, wall space limits, and outdoor wiring needs before you buy equipment.
Walk to the place where your EV normally stops. Look at the side of the car with the charge port. Some cars have the port near the front, while others have it near the back. A charger mounted on the wrong wall may need a longer cable, which can become a trip risk or hang across a walkway.
Use a tape measure if you have one. Measure from the likely charger wall to the charge port. Also note the distance from the electrical panel to that wall. A short run through an attached garage often costs less than a long run through a finished basement, crawl space, attic, or outdoor trench.
Write down these first details
- Your normal parking spot and charge port location.
- The distance from the service panel to the charger wall.
- Whether the charger will be indoors, outdoors, or under a carport.
- Any gate, walkway, shared drive, or public sidewalk near the cable path.
- The panel rating, such as 100 amp, 150 amp, or 200 amp.
Take clear photos of the panel label, the garage wall, and the parking area. These photos help an electrician give a better early estimate. They also help you explain the plan when you call the building department. In everyday use, this step takes about five minutes, yet it can save several calls and one wasted site visit.
Do not assume an ordinary wall outlet is the answer. A standard 120 volt outlet can charge some EVs, but it often adds only a small amount of driving range each hour. For drivers with longer daily trips, a Level 2 charger on a 240 volt circuit is usually more useful. Still, the right choice depends on your daily miles, home panel, and local rules.
How Do Zoning Rules Affect a Home EV Charger?
Zoning rules may affect a home EV charger when work changes the outside of the property, uses a driveway edge, adds a post, or crosses a shared area. Indoor garage chargers often face fewer zoning questions, but local rules still control the final answer.
Have you noticed that a charger on an outside wall can touch more than electrical rules? A wall-mounted charger may be simple in a private garage. A charger on a front-facing wall, beside a shared drive, or near a property line can bring up setback, design, or access rules.
Start with your city or county planning office website. Search for terms such as “electric vehicle charging,” “residential accessory equipment,” “driveway charging,” and “right-of-way.” If the website is unclear, call the planning desk and describe the exact location. Ask if a charger needs zoning review before you apply for an electrical permit.
A good first step is to draw a basic site sketch. Show the house, garage, driveway, sidewalk, property lines, and proposed charger. Add simple measurements. This does not need to be a formal building plan. It gives staff a clear picture and helps them tell you if a post, trench, or outdoor box needs more review.
Areas that often need extra checks
Outdoor pedestal chargers may need more care than garage wall chargers. A pedestal is a stand-alone post that holds the charging unit. It may be treated like other yard equipment, especially if it sits near a setback area. A trench from the house to a detached garage may also need a utility locate request before digging.
Shared housing brings added limits. Condo groups, townhomes, and homes with common parking may have homeowner association rules. You may need written approval for a charger, a parking space change, or work on a shared electrical room. Keep every approval in writing. Verbal permission can be hard to prove later.
For related yard projects, our guide to backyard zoning checks shows a useful way to read setback maps and permit notes. The same habit helps with a charger near a fence, side yard, detached garage, or drainage area.
Do not run a charging cable over a public sidewalk or street. That can create a trip danger and may block public access. Some places have special curbside charging programs, but a private extension cord is rarely an approved long-term plan. Ask the local office about off-street charging choices if your home has no driveway.
Match the Charger to Your Electrical Panel
Match the charger to your panel by checking available capacity, circuit space, wire path, and charger output before choosing an amp rating. A licensed electrician should perform a load calculation, especially when your home has electric heat, air conditioning, or a 100 amp service.
Level 2 chargers commonly use a 240 volt circuit. They may supply 16, 24, 32, 40, or 48 amps, depending on the model and wiring. More charging power can reduce charging time, but it also asks more from the home electrical system. A smaller charger can still meet your needs if you drive modest daily miles.
The circuit must be sized for the charger and the local electrical code. EV charging is often treated as a continuous load, meaning the circuit needs extra room above the charger’s working output. For example, a charger set to 32 amps often needs a 40 amp circuit. A 40 amp charger often needs a 50 amp circuit.
Read the panel before making assumptions
Open only the outside panel door. Do not remove the metal cover. Look for the main breaker rating, open breaker spaces, and the label inside the door. Note large loads already listed, such as electric water heat, clothes dryer, heat pump, range, hot tub, pool pump, or workshop tools.
When we checked a typical older home setup, the panel had open spaces but not enough safe load room for a high-output charger. That is an important difference. Empty breaker slots do not prove the service has enough capacity. The load calculation looks at the full home demand, not just the number of open spaces.
Ask the electrician to explain three things in plain words: your present service size, the safe charger size, and the cost difference between a basic circuit and a panel upgrade. A 200 amp panel may have room for a 40 amp or 50 amp circuit. A 100 amp panel may still work, but the answer depends on the home’s other electrical loads.
Hardwired chargers are fixed directly to the circuit wiring. Plug-in chargers use a receptacle, often a NEMA 14-50 outlet. Hardwired units can reduce outlet wear and may allow higher charging output. Plug-in units can be easier to replace, but the outlet, plug, breaker, wire, and charger must all be rated for the load.
What Permits Do You Need for an EV Charger?
Most Level 2 home EV charger installs need an electrical permit and a final inspection, even when the charger sits inside a private garage. Your city or county building department sets the exact rule, so confirm it before work begins.
Permit rules may feel slow, but they protect the home and the people using it. The permit record shows that a qualified person installed the circuit and that an inspector checked the work. It can also help during a home sale, an insurance question, or a future repair.
Some areas let a homeowner apply for the permit and do allowed work. Other areas require a licensed electrical contractor. Local rules may also change based on the charger size, panel work, detached garage wiring, or trenching. Do not rely only on a neighbor’s past project because local rules can change.
- Call the building department and ask if a Level 2 charger needs an electrical permit.
- Ask if a site plan, panel photo, or load calculation is required.
- Check if outdoor work needs a zoning or planning review.
- Apply before wiring begins, unless the office gives a different instruction.
- Schedule the rough and final inspections required for the project.
Permit forms often ask for the charger model, circuit size, voltage, breaker size, wire type, and install location. Keep the charger manual nearby. It lists the electrical rating and wiring needs. If your electrician applies for the permit, ask for a copy of the permit number and approved work details.
Some utility companies offer lower electricity rates for overnight EV charging. These plans may need a separate meter, a time-of-use rate, or proof of a permitted charger. Check the utility website before you choose a charger size. A lower overnight rate can make regular charging easier on your monthly bill.
If local staff refer to code rules, ask which version they use and whether local changes apply. The U.S. Department of Energy home charging guide also explains the basic difference between Level 1 and Level 2 home charging. Use it as a starting point, then follow your local permit office and inspector.
Plan the Charger Location, Wiring, and Daily Use
Place the charger where its cable reaches the charge port without crossing a walking path, stretching tight, or sitting in standing water. Plan the wiring route at the same time, because a neat short route is often safer and less costly.
For this reason, the best charger wall is not always the wall nearest the panel. A wall close to the car may be better if it keeps the cable off the floor and away from doors. Think about how you park after a long day. The charger should be easy to use in rain, darkness, and cold weather.
| Check | What to measure or ask | Why it matters |
|---|---|---|
| Parking position | Measure wall-to-port distance | Prevents a tight or unsafe cable path |
| Electrical panel | Confirm service size and load calculation | Shows the safe Level 2 charger output |
| Outdoor setup | Check weather rating and trench route | Helps protect wiring from water and damage |
| Permit file | Save permit number and inspection result | Supports future repairs and home sales |
Outdoor chargers need equipment rated for outdoor use. The charger box, cable, outlet if used, and cover should suit rain, sun, and temperature changes. An electrician can help choose the right enclosure and wire method. Never use a light-duty extension cord as a daily EV charging setup.
Think about cable storage too. A cable hook keeps the connector off the ground and reduces damage. If children, pets, or visitors use the garage, place the charger where the cable can be put away after each use. Keep the path near the panel and charger clear so future service work is easier.
Charging does not always need to happen at the highest speed. A driver who travels 25 miles a day may recover that energy overnight with a modest Level 2 setting. A lower setting can sometimes avoid a panel upgrade. Let’s consider this: paying less for a 24 amp or 32 amp setup may be wiser than paying for a larger service when your daily use is small.
Park your EV in its normal spot, then measure from the proposed charger wall to the charge port before choosing the charger location and cable length.
Work With the Electrician and Inspector Effectively
Give the electrician clear photos, measurements, and your car’s charging needs before the site visit. Ask for the circuit size, wire route, permit plan, and inspection steps in writing so you know what the quoted work includes.
A good electrician does more than mount a charger. They look at the panel, calculate electrical demand, check grounding and bonding, choose the correct breaker, and plan the wiring path. They should also know when a garage, carport, detached building, or outdoor location needs special equipment.
Ask for a quote that separates the main parts of the work. The list may include the charger unit, breaker, wire, conduit, outlet or hardwire connection, trenching, permit fee, panel work, labor, and inspection visit. Separate prices make it easier to compare two quotes without guessing what is missing.
Questions worth asking before work starts
- What charger output fits my daily driving and panel capacity?
- Will you complete the permit application, or should I do it?
- Is the charger hardwired or plug-in, and why?
- Will the wire run through finished walls, attic space, or outside conduit?
- Could the panel need an upgrade after the load calculation?
- Who will meet the inspector if a question comes up?
Be present for the inspection if possible, even if the electrician attends. You do not need to know technical terms. Listen for any correction note and ask what it means for normal use. Inspectors may ask for a label, a clearer disconnect point, a cover, a cable support, or a small wiring change.
Do not turn on the charger until the electrician says the work is ready and the required inspection is complete. A final inspection is not just paperwork. It is a last check that the breaker, wire, connections, and equipment match the approved plan. That is especially helpful when high current will run for several hours overnight.
Keep your charger manual after the work is done. It explains settings, Wi-Fi features, fault lights, cleaning, and basic reset steps. If you later add solar panels, a battery system, electric appliances, or a second EV, the record will help the next electrician understand the existing load.
Keep Your Home Charging Setup Ready for the Years Ahead
Keep your home charging setup ready by saving records, checking the cable monthly, and reviewing electrical capacity before adding major appliances. Small habits can help you spot wear early and make future upgrades easier to plan.
Create one paper folder or digital folder for the project. Save the permit, approved plan, inspection record, electrician invoice, charger manual, product receipt, warranty details, and photos taken before walls were closed. Add the circuit size and breaker location in simple words. This file can save time when you need service years later.
Check the cable and connector about once a month. Look for cuts, loose parts, bent pins, heat marks, cracked plastic, or water inside the connector cover. Stop using the charger if you see damage, smell burning, or feel unusual heat at the plug, outlet, cable, or panel. Call a qualified electrician for help.
Keep the charger area dry and clear. Do not pile boxes, paint cans, or garden tools around the panel or charging equipment. If the charger is outside, clear leaves and snow from the base area. Make sure the connector has a clean holder so it does not sit in dirt or water.
Your home may change over time. A new heat pump, electric water heater, induction range, hot tub, workshop tool, or second EV can change the load on your electrical service. Before adding another large electrical item, ask for an updated load calculation. This is also wise if lights dim, breakers trip, or the panel becomes warm.
For homes outside city sewer areas, property projects can overlap in unexpected ways. A planned trench or parking change may need review near a septic area, so read our guide to septic zoning rules before digging near the yard. Careful records and early checks keep the charger useful without creating new property problems.
A safe EV charger is not only about fast charging. It is about a sensible location, enough electrical capacity, approved work, and records you can use later. Start with the five-minute site check, then take each next step in order. That calm approach makes home charging easier to live with every day.

Letizia Neri
Founder & Environmental Zoning EditorLetizia Neri, born and based in Roma, Italy, is the founder and lead editor of Eco Zoned. She helps homeowners understand local environmental zoning rules through practical, plain-language advice for planning projects and making informed property decisions.