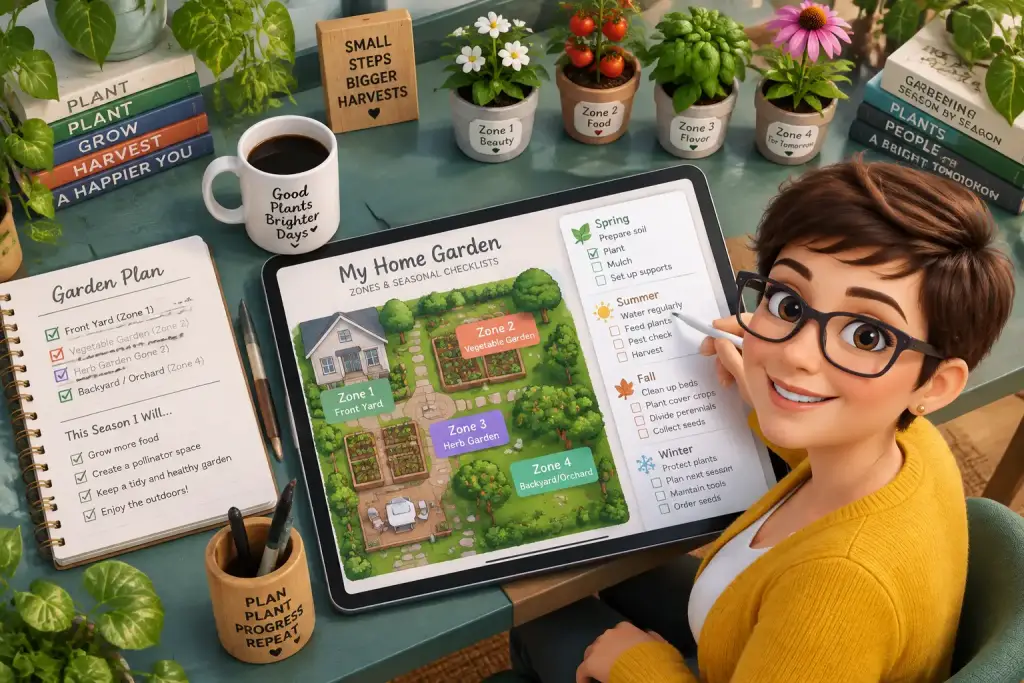










A good backyard zone plan starts with the way your household already uses the space. Watch where people walk, sit, carry bins, fill watering cans, and play. Those daily habits show where each area should go, helping you cut wasted water, avoid worn grass, and make eco-friendly choices feel easier to keep.
- Track one normal week of outdoor trips before drawing paths, beds, seating areas, or storage spaces.
- Put high-use areas within a short walk of the house, water source, and main door.
- Test the plan for seven days, then move small items before building permanent features.
Table of Contents
Start with a seven-day activity map
Track outdoor use for seven normal days before drawing your first plan. Mark each trip from the house, the time of day, and the reason for it, because real movement tells you more than a perfect-looking sketch.
Use plain paper, a phone note, or a printed map of your yard. Start with the house walls, doors, fence lines, large trees, sheds, taps, bins, and fixed paths. You do not need exact survey-level detail. A rough scale where one square equals one metre is enough for most home plans.
Carry the map outside at different times. Mark where the morning sun falls, where late-day shade sits, and where rainwater collects. Also note noisy areas, windy corners, and views you want to keep or hide. These details help you avoid placing a chair in a hot spot or putting a vegetable bed under deep shade.
Record the trips that happen most
Write down every outdoor trip that repeats. The walk from the kitchen to the compost bin matters. So does the route from the hose tap to food beds. A path used ten times a week needs a firm surface. A path used once a month can stay as mulch, grass, or stepping stones.
- Mark rubbish and recycling trips.
- Mark pet routes and play areas.
- Mark routes used when carrying groceries or laundry.
- Mark seating areas used in the morning or evening.
- Mark watering, pruning, and harvest trips.
When we tested this setup at home, the most useful finding was not the sunny corner. It was the muddy strip beside the back door. That short route was used several times each day, so a narrow permeable path solved more daily trouble than a new patio would have.
Use dots, arrows, and short notes
Keep the markings easy to read. Use red dots for busy places, blue lines for water movement, yellow circles for sunny spots, and green marks for existing plants worth keeping. Add short notes such as “wet after rain,” “hot at 4 pm,” or “dog runs here.” Instead of guessing, you will have a useful record of how the yard works.
Which daily activities should shape your backyard zones?
Your most repeated activities should get the closest and easiest zones. Put everyday tasks near the house, while low-care planting, habitat space, and larger trees can sit farther away where they need fewer visits.
Think of the yard in rings, not strict boxes. The first ring is the area nearest your main door. It may hold a rain barrel, herb pots, a small food bed, a compost caddy, and a seat. The next ring can hold bigger garden beds, a washing line, a play area, or a compost bin. The outer ring can hold native shrubs, a pollinator strip, fruit trees, or a small wild corner.
Here is why that matters: distance affects care. A mint pot beside the kitchen may get water every few days. The same pot at the far fence may dry out before you remember it. Place plants that need frequent picking, watering, or checking within about 10 to 15 metres of the door you use most.
Rank each activity by weekly use
Give every activity a score from one to three. A score of three means daily or near-daily use. A score of two means weekly use. A score of one means monthly or seasonal use. This quick score helps stop a common planning error, where a rarely used fire pit gets the best spot while bins and food beds get pushed to awkward corners.
- List each outdoor activity your household does.
- Give it a weekly use score from one to three.
- Write what it needs, such as sun, water, shade, privacy, or storage.
- Place score-three activities closest to the main exit.
- Keep room for routes between every busy zone.
A food growing area often needs six or more hours of direct sun, easy access to water, and a clear route for carrying harvests indoors. A quiet seat may need afternoon shade, less noise, and a view of plants or birds. A compost bin needs easy access from the kitchen, but it does not need the best view from your window.
On the flip side, not every useful feature needs to be close. Native hedges, leaf piles, and low-water shrubs work well at the edge of the yard. They can provide shelter for insects and birds without asking for daily attention. The best plan gives close space to daily needs and quiet space to nature.
Build a backyard zone plan on paper
Draw your backyard zone plan in layers, starting with fixed features and daily routes. Add water, sun, plant areas, and rest spaces only after the main walking lines are clear, so the plan works on busy weekdays.
Place tracing paper over your base map if you have it. Use one sheet for routes, one for water and drainage, and one for planting. This lets you test changes without starting again. If you prefer a digital option, take a photo of your sketch and draw over it with a basic phone or tablet app.
Start with the “hard” parts that are costly to move. These include the back door, shed, tap, drain, mature trees, fence, and existing paving. Then draw the shortest safe routes between the door, bins, washing line, compost bin, seating, and food beds. Leave about 90 centimetres for a main walking path. A smaller side path can be about 45 to 60 centimetres wide.
| Planning step | What to check | Useful tool or fix |
|---|---|---|
| Daily routes | Foot traffic, muddy corners, door access | Chalk, string, or small flags |
| Sun map | Morning, noon, and late-day shade | Phone photos taken three times |
| Water plan | Tap distance, runoff, wet soil | Rain barrel and soaker hose |
| Plant zones | Sun hours, soil moisture, care needs | Plant labels and soil notes |
| Low-use edges | Privacy, wildlife cover, wind | Native shrubs and mulch |
Use the table as a quick check while you draw. Do not force every part of the yard into a neat shape. Curved beds can work well around existing trees, while straight paths may suit a narrow side yard. The goal is not a showpiece map. It is a plan that makes daily life less wasteful.
Keep at least one flexible area. A 2 by 2 metre open patch can become a play spot, extra food bed, small table area, or drying space later. This is useful for renters and new homeowners who are still learning how their outdoor routines may change.
As a rule of thumb, mark puddles after one heavy rain before choosing path, lawn, food bed, or rain garden locations.
How do you place water, shade, and plants?
Put thirsty plants near water and group plants with similar needs together. Check sun and soil moisture before choosing each plant area, because a plant in the wrong spot often needs more water, feed, and replacement.
Start with water. A rain barrel below a downpipe can collect roof runoff for pots and small beds, where allowed by local rules. Keep the barrel on a level base and close enough to where you will use the water. A soaker hose works best in beds near the house, since it puts water near roots instead of spraying paths and leaves.
Watch how water moves after rain. If one area stays wet for more than a day, do not place a main path or seating area there. It may suit a rain garden with plants that can handle damp soil. If the ground slopes toward the house, guide water away with shallow planted areas, mulch, or a small swale where suitable.
Match plant layers to each zone
Use plant height and care needs to shape each area. Low ground covers can protect bare soil near paths. Shrubs can screen bins or make a quiet corner feel more private. Small trees give shade, while climbers can cover a fence without taking much ground space. Our guide to plant layers can help you choose a clear mix for each zone.
Keep food beds away from heavy foot traffic and pet toilet areas. Aim for a bed width of about 1.2 metres if you can reach from both sides. This size lets you tend the middle without stepping on soil. Add mulch around beds to slow water loss and reduce weeds.
As a rule of thumb, place shade-loving plants where they get less than four hours of direct sun. Put most vegetables in areas with six to eight hours. Native plants are often a sensible choice for outer zones because they may need less extra water once established. Check which plants are suitable for your local climate and soil before buying them.
Fix weak spots before you build anything permanent
Test your plan with temporary markers before buying paving, timber, or large plants. Use string, cardboard, pots, and chairs for one week, then change any area that blocks a route, stays wet, or feels too far from daily use.
Start by marking planned paths with rope, old hoses, or chalk. Walk them while carrying a full laundry basket, a bag of compost material, or a watering can. Can you pass without brushing a wall or plant? Does the route work when the ground is wet? A path that looks fine on paper may feel too narrow when used with real loads.
Watch for shade changes too. A seat that feels pleasant at 10 am may become too hot by 3 pm. Move a chair around for several days before building a deck or laying gravel. This test costs almost nothing and can save a lot of waste.
Use small fixes for common problems
- Mud near a door: Add mulch first, then use permeable pavers or gravel if the route stays busy.
- Dry pots: Group them near the tap or rain barrel and add a saucer only where it will not cause root rot.
- Unused seating: Check shade, wind, privacy, and distance from the house before moving it.
- Overgrown bed: Reduce bed width or add a path so every plant stays reachable.
- Water pooling: Keep heavy use away from the spot and test a rain garden or planted dip.
A common slip-up is making every zone permanent too early. Start with movable pots, wood chips, and simple edging for the first season. On the flip side, do build safe steps, drainage work, and stable access routes properly when you are sure of their position.
Small yards need extra care because every metre has more than one job. A narrow side area may work as a bin route, herb strip, and rainwater path. Use our small yard zones guide if you need ideas for fitting daily tasks into limited space.
Test the plan during a normal week
A zone plan is working when daily tasks take less effort and the yard stays usable after sun, rain, and busy family days. Check it during one normal week, then make small changes based on what people actually do.
For seven days, keep a short note near the back door. Write down problems as they happen. You may notice that the compost bin is too far away, the hose catches on a corner, or the dog cuts through a new bed. These notes are more useful than trying to remember everything at the end of the month.
In everyday use, this step takes about five minutes each evening. Ask three basic questions: Did anyone avoid a route? Did any area need more water or shade? Did a task feel harder than it should? If the answer is yes, change the layout while the problem is still easy to fix.
Check each zone by season
Repeat your check when the weather changes. Summer can show dry soil and harsh sun. Autumn can show blocked drains and leaf buildup. Winter can reveal puddles and slippery routes. Spring often shows where new growth blocks a path or where you need more planting space.
Keep a short care list for every zone. Write down when mulch needs topping up, when rain barrels need cleaning, and when shrubs need trimming away from paths. A clear seasonal zone checklist helps you spread small jobs across the year instead of facing one large weekend task.
The takeaway here: the best eco-friendly backyard plan is not the one with the most features. It is the one that fits your real trips, uses water wisely, protects soil, and leaves room for plants and wildlife. Begin with your daily routine, test your ideas outdoors, and let the plan improve as your home life changes.

Matteo Mariani
Founder & Lead Landscape EditorBorn and based in Italy, Matteo Mariani is the founder and lead editor of Eco Zoned. He helps readers make thoughtful outdoor planning choices with practical advice on lower-impact gardens, functional spaces, and landscape zones for everyday homes.