








A garden can look full in June and still feel empty in January. Thoughtful plant layers solve that problem by mixing evergreen plants that stay green with deciduous plants that change through the seasons. The result is a clear garden shape, better soil cover, and less pressure to fill every open space with new plants each spring.
- Place evergreen shrubs first because they hold the garden shape when deciduous plants lose leaves.
- Leave space for each plant's full mature width, not the size shown in the nursery pot.
- Check beds in winter, spring, summer, and fall to spot gaps, crowding, and shade changes early.
Table of Contents
Start Plant Layers With a Simple Bed Map
Start plant layers by drawing the bed shape, marking sun and shade, and choosing the main view from your home. Put evergreen plants where you need a steady frame, then add deciduous trees, shrubs, and smaller plants around them for seasonal change.
Grab paper, a pencil, a tape measure, and a phone camera. Measure the length and depth of each bed, then note nearby paths, windows, fences, drains, and outdoor seating. This takes about 15 minutes for a small front bed, yet it can stop years of crowding problems.
Look at the space from the places you use most. Stand at the front door. Sit where you drink coffee outside. Look through the kitchen window. A garden bed may look balanced from the driveway but block light from inside the house. For help with this part, use our guide to plant height planning before buying anything.
Mark each area with one of three simple labels: back layer, middle layer, or front layer. The back layer often has small trees, tall shrubs, hedges, or screening plants. The middle layer has rounded shrubs and flowering plants. The front layer has lower grasses, ground covers, bulbs, or small perennials. These groups do not need to be stiff rows. They simply help your eye read the garden from low to high.
- Back layer: plants about 1.5 to 4 metres tall at full size.
- Middle layer: plants about 60 centimetres to 1.5 metres tall.
- Front layer: plants under 60 centimetres tall near paths and lawn edges.
Keep a clear strip beside paths. A gap of 30 to 45 centimetres from the path edge gives plants room to grow without leaning into where people walk. It also makes weeding, mulching, and cutting back old stems much easier.
How Do Evergreen and Deciduous Plants Work Together?
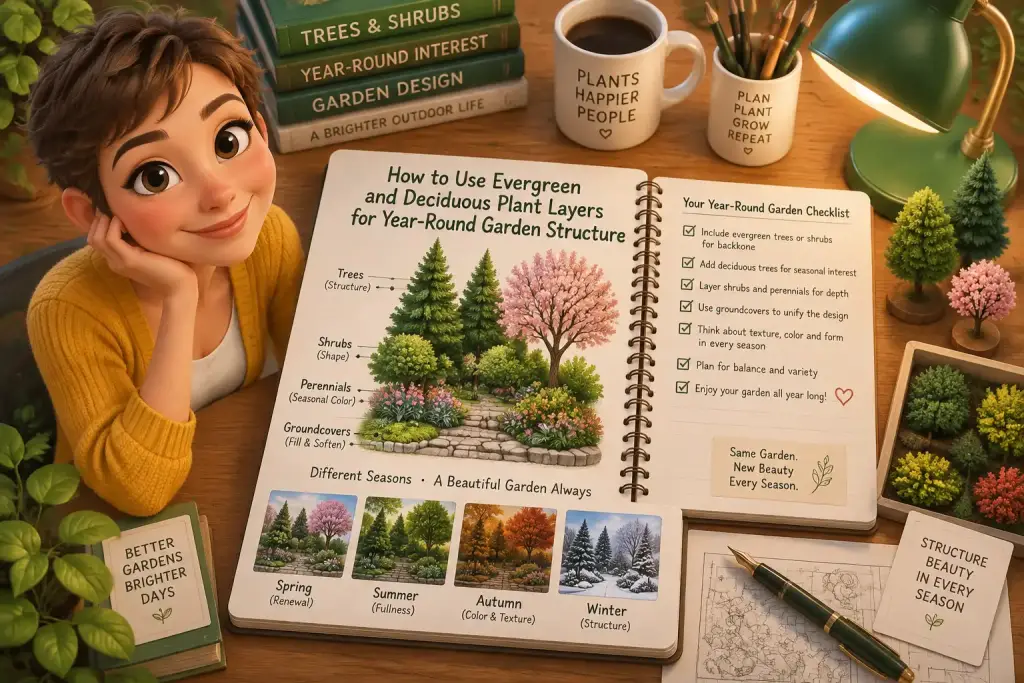
Evergreen and deciduous plants work best when evergreens hold the main shape and deciduous plants bring light, flowers, fruit, and leaf color. Use a mix instead of filling every bed with one type, because each group covers a different season.
Evergreen plants keep leaves or needles through winter. They can form a hedge, soften a fence, block a poor view, or give a bed a strong outline after frost. Good choices depend on your local climate, soil drainage, and sun hours. Broadleaf evergreens, such as boxwood or some viburnums, give a fuller leaf look. Conifers, such as juniper or dwarf pine, often need less trimming once settled.
Deciduous plants lose leaves in the colder months. That may sound like a weakness, but it gives you useful change. Their bare branches let winter sun reach nearby windows and lower plants. Spring leaves, summer shade, fall color, berries, seed heads, and bark all add interest without making the garden feel heavy every month.
Look at it this way: evergreens are the furniture in a room, while deciduous plants are the curtains, flowers, and changing light. A small evergreen near a deciduous shrub can stop a winter bed from looking flat. A deciduous tree behind an evergreen group can give summer shade without creating a thick dark wall all year.
Use the three to one rule as a starting point
For a mixed planting bed, try roughly three deciduous plants for every one evergreen plant. This is not a hard rule. A windy boundary may need more evergreens for shelter. A sunny small yard may need fewer evergreens so winter light can still reach the house and lawn.
When we tested this setup in a narrow side bed, one upright evergreen shrub with three deciduous shrubs made the space feel full without closing it in. The evergreen held the corner together in winter. The deciduous shrubs made the bed lighter in summer and showed more branch detail after leaf fall.
Build Each Bed From Back to Front
Build each bed from the tallest plants down to the lowest ones, checking mature height and width before digging. Place the main evergreen anchors first, then set deciduous shrubs, grasses, and ground covers around them with enough open soil between plants.
Step 1: Set the evergreen anchors
Place one to three evergreen shrubs or small trees where the garden needs shape all year. Good spots include bed corners, both sides of an entry path, the end of a long border, or in front of a plain fence. Do not place every evergreen in a straight line unless you want a formal hedge.
Use the plant tag to check mature width. If a shrub will grow 1.2 metres wide, give it close to 1.2 metres of open space from the center of the plant to the next large shrub. Tight planting can look neat in year one, but it often leads to heavy pruning, poor airflow, and bare lower branches later.
Step 2: Add deciduous shape and seasonal color
Set deciduous shrubs between or behind evergreen anchors. Choose plants with different jobs. One may flower in spring, another may have red fall leaves, and another may keep berries for birds. Keep the number of different plant types low in small beds. Three to five kinds usually look calmer than twelve single plants.
Step 3: Finish with low plants and mulch
Fill the front layer with low plants that cover soil but do not hide taller stems. Clumping grasses, hardy geraniums, sedges, creeping thyme, and spring bulbs can all work, depending on your climate and light. Spread a 5 to 7 centimetre layer of natural mulch after planting, but keep mulch about 8 centimetres away from trunks and shrub stems.
Mulch helps hold soil moisture, slows weeds, and protects roots from fast temperature changes. Use fallen leaves too, if they are not diseased. Shred them first with a mower, then spread a thin layer around shrubs. Our guide to mowing and mulching habits shows how to use yard cuttings without making a messy thick mat.
- Set plants in their pots before digging and view them from several angles.
- Move pots until gaps and heights look balanced from your main viewing point.
- Dig holes about twice as wide as the root ball, but no deeper.
- Water slowly after planting so moisture reaches the full root zone.
Take a photo of each planting bed on a clear winter day. Bare areas are much easier to see, helping you choose where an evergreen shrub or small tree will help most.
Match Spacing, Soil, and Water to Each Layer
Match each plant layer to its mature size, soil drainage, and water needs before planting. Group plants with similar needs together, because a dry-loving evergreen and a thirsty deciduous shrub will not stay healthy under the same watering plan.
Read labels with care. Nursery labels often show height and width at maturity, plus sun needs such as full sun, part shade, or shade. Full sun usually means at least six hours of direct sun. Part shade often means about three to six hours. Check your bed at morning, noon, and late afternoon because a fence or tree can change the amount of light.
Test drainage with a simple hole test. Dig a hole about 30 centimetres deep, fill it with water, and let it drain. Fill it again and watch how fast the water drops. If water stays in the hole for a full day, avoid plants that need dry roots. Use raised planting areas or choose plants that cope with wetter soil instead.
| Bed check | Simple tool or setting | What to do |
|---|---|---|
| Mature plant width | Plant label and tape measure | Space large shrubs by their full listed width. |
| Sun hours | Phone notes or paper chart | Record direct sun at three times in one day. |
| Slow drainage | 30 centimetre hole test | Raise the bed or choose plants for damp soil. |
| Dry root zone | Finger test, 5 centimetres deep | Water slowly when soil feels dry below the mulch. |
| Winter bare spots | Garden photo in winter | Add one evergreen anchor, not several random plants. |
Day to day, water new plants deeply once or twice a week during dry weather rather than giving them a light spray every day. The exact amount changes with heat, rain, soil type, and plant size. Check soil under the mulch first. If it feels cool and moist 5 centimetres down, wait before watering again.
Feed soil with compost instead of relying on strong plant food. A 2 to 3 centimetre top layer of finished compost under mulch can help soil hold water and support roots. Simple composting habits can turn suitable kitchen and garden scraps into useful material for planting beds.
What Mistakes Make Garden Layers Look Crowded?
Crowded garden layers usually come from planting too close, using too many tall plants, or ignoring winter views. Fix these issues by removing weak plants, opening small gaps, and letting each evergreen or deciduous shrub have a clear role in the bed.
The most common problem is buying plants for how they look in small pots. A 30 centimetre shrub can grow to more than one metre wide in a few years. When shrubs touch too soon, their lower leaves often thin out because light cannot reach them. Air also moves poorly through packed growth, which can lead to more leaf problems in damp weather.
Fix plants that block paths or windows
Prune only small amounts when possible. Cut back a branch to a side branch, not straight across the outer edge. If a plant has outgrown its space badly, moving it in cool weather may work better than cutting it into a hard ball. Choose a smaller mature plant for the spot after moving it.
Do not place large evergreen shrubs directly under low windows. Their winter shade can make rooms feel darker when daylight is already limited. Use lower evergreen ground covers or compact shrubs there, then place taller deciduous plants farther away where summer shade will help more.
Fix bare lower stems and empty gaps
Bare lower stems often mean plants are too close, too shaded, or trimmed into shapes they do not suit. Remove one crowded plant before adding more. A small gap can be healthy. Fill it with mulch, bulbs, or a low plant only after checking that the remaining shrubs have enough room.
Avoid using one evergreen type across every bed. Repeating a plant can make a garden feel calm, but too much repetition can make winter views dull and create a bigger problem if that plant gets sick. Mix leaf shapes, plant sizes, and flowering times while keeping your main color choices simple.
Check Your Garden Structure Through Every Season
Check garden structure once in each season by taking photos from the same places and noting shade, gaps, and crowding. Winter shows the true frame, spring shows empty spaces, summer shows height and shade, and fall shows where leaves and seed heads add interest.
To make this easier, stand in the same two or three spots each time. Take one wide photo and one close photo of each main bed. Name the image with the month and location, such as “front-bed-January.” After one full year, these photos give you better answers than memory.
In winter, ask if evergreen plants still give the bed a clear shape. Look for empty sections near entries, corners, and fence ends. In spring, check if bulbs, fresh leaves, and early flowers sit in front of woody shrubs rather than hiding them. In summer, watch where trees cast shade and whether shrubs lean into paths.
Fall is a good time to see which deciduous plants earn their space. Leaves may turn color, berries may remain, and dry seed heads can add texture. Leave healthy stems standing through winter when they look tidy and do not block paths. Cut back plants that flop over walkways or hold wet, broken growth.
Use a short seasonal checklist instead of making big changes every month:
- Winter: photograph bare structure and note weak evergreen areas.
- Spring: add mulch, inspect new growth, and move small plants if needed.
- Summer: check watering, shade, path space, and overcrowding.
- Fall: collect leaves for mulch, plant suitable shrubs, and review photos.
A well-layered garden does not need to look perfect all year. It should look planned, healthy, and useful in every season. Small changes, made after real observation, usually work better than a full bed makeover. From there, your evergreen frame and deciduous seasonal plants can grow into a garden that feels settled rather than overfilled.

Matteo Mariani
Founder & Lead Landscape EditorBorn and based in Italy, Matteo Mariani is the founder and lead editor of Eco Zoned. He helps readers make thoughtful outdoor planning choices with practical advice on lower-impact gardens, functional spaces, and landscape zones for everyday homes.