







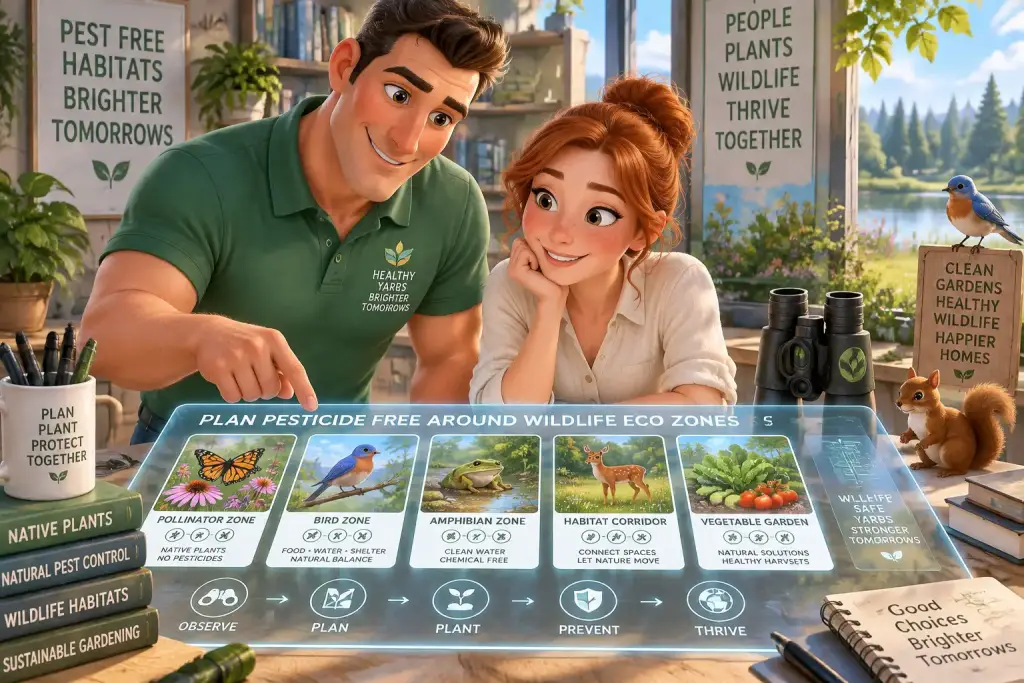
A healthy backyard can have fewer weeds and pests without poison. Pesticide Free Control works best when you plan around the places wildlife uses every day, such as bird cover, bee flowers, water dishes, log piles, and native plant beds. A little planning now can save hours of pulling, spraying worries, and sad surprises later.
- Mark bird, bee, water, and native plant areas before choosing weed or pest actions.
- Use mulch, hand pulling, plant spacing, and leaf checks before trying any pest treatment.
- Check each eco zone weekly and record pest damage so you can act early with the smallest safe step.
Table of Contents
- Map wildlife zones before you touch weeds
- How do you set up Pesticide Free Control around wildlife?
- Build a weed plan that leaves cover for small animals
- What is the best way to manage garden pests safely?
- Choose tools and timing for each eco zone
- Fix common planning slips before they harm wildlife
- Check your results through the seasons
Map wildlife zones before you touch weeds
Mark the places wildlife uses before you pull weeds or treat pests. A simple map helps you keep tools, mulch, and garden work away from bird nests, bee spots, frogs, and water.
Look at it this way: your yard has busy areas and quiet areas. A path beside the house may need regular weed work. A thick shrub bed with nesting birds needs a slower approach. Walk through your space in the morning or near sunset for three days. These are often good times to see birds, bees, butterflies, and small animals using the garden.
Draw a basic yard shape on paper. You do not need a perfect plan. Add your lawn, paths, vegetable beds, shrubs, trees, compost area, bird bath, feeder, and water bowl. Then circle places where you see wildlife. Use one color for bird cover, one for flowers used by bees, and one for wet areas.
Give each area a work level. High work areas are paths, patio cracks, and bed edges. Medium work areas are flower beds where you can reach plants easily. Low work areas are native plant patches, brush piles, pond edges, and thick hedges. In low work areas, pull only weeds that clearly smother wanted plants or spread fast.
Make a simple no-spray boundary
Set a clear no-spray boundary around every wildlife feature, even if you do not plan to spray anything. This small rule keeps your choices clear when you feel rushed. Keep hand tools, mulch, and buckets as your first choice inside these areas.
- Leave a 3 foot space around bird baths, feeders, and water dishes free from any treatment.
- Leave a 5 foot space around pond edges, wet soil, and frog shelter areas.
- Keep flowering plants used by bees free from sticky traps and broad pest sprays.
- Check shrubs for nests before cutting, pulling vines, or moving branches.
When we tested this setup in a small backyard bed, the map stopped us from pulling a plant that looked like a weed but was sheltering young grasshoppers. Those grasshoppers later fed robins. A map does not need to be fancy. It just helps you pause before acting.
How do you set up Pesticide Free Control around wildlife?
Set up Pesticide Free Control by removing easy weed space, growing strong plants, and checking pests early. Start with soil, mulch, plant spacing, and clean tools before using traps or any home treatment.
The short answer is simple: pests and weeds do better when plants are weak, soil is bare, or leaves stay wet too long. Your job is not to make the yard empty of insects. Your job is to stop one problem from growing large enough to hurt plants or wildlife space.
Begin with the ground. Spread 2 to 3 inches of leaf mulch, wood chips, or clean shredded bark around shrubs and perennials. Keep mulch about 2 inches away from plant stems. Mulch blocks light from small weeds, holds soil moisture, and gives ground beetles a cool place to hide. Ground beetles eat some pest eggs and small insects.
Choose plants that fit the sun and soil in each bed. A shade plant in hot full sun often becomes weak and attracts more pests. Give plants enough space for air to move between leaves. For small plants, 12 to 18 inches can be enough. Larger shrubs may need 3 to 5 feet, based on their full grown size.
Water the soil near plant roots instead of wetting every leaf. A slow hose, watering can, or drip line works well. Wet leaves can lead to plant sickness, especially during warm weeks. Water early in the day so any wet leaves can dry before evening.
Gather a small working kit
You do not need a shed full of gear. Keep one bucket or tote close to your main garden area. Having tools ready makes it easier to solve a small problem before it spreads.
- Hand fork or narrow weeding tool for deep roots.
- Garden gloves and a bucket for pulled weeds.
- Pruning snips cleaned with soap and water.
- Fine insect netting or row cover for young food plants.
- Notebook or phone notes for pest checks and weather notes.
Clean bird baths and feeders on their own schedule, not during weed work. Your bird bath cleaning routine can help keep water areas safe while you work on nearby beds. Keep garden soil and pulled plant matter out of wildlife water.
Build a weed plan that leaves cover for small animals
Control weeds by blocking new growth and pulling young plants before seeds form. Leave safe plant cover in wildlife zones, but remove fast spreading weeds that crowd out native flowers, food plants, and shelter.
Day to day, the best weed plan is small and steady. Spend ten minutes twice a week on bed edges, path cracks, and bare soil. Young weeds often come out with two fingers. A large weed with a deep root may take twenty minutes and leave loose soil behind.
Focus first on weeds that take over. These may climb shrubs, form thick mats, or spread seeds across the yard. Check local garden groups or your local council list if you are unsure about a plant. Keep the plant or take a clear photo before removing it. Some native seedlings can look messy when young.
Pull, cover, and repeat
Pull weeds after rain or after a deep watering. The soil will be softer, so you are more likely to get the full root. Hold the weed close to the ground, loosen soil with a hand fork, and pull slowly. Toss plants with seeds or thick roots into a sealed yard waste bag if they may regrow in compost.
- Pull weeds from paths, borders, and bare soil first.
- Cut seed heads from large weeds before digging roots.
- Cover open soil with mulch, leaf mold, or a cardboard layer under mulch.
- Check the same place after seven days for new shoots.
- Add more mulch when the layer becomes thin or breaks down.
Cardboard can help under wood chips in a new bed, but keep it away from tree trunks and plant stems. Wet the cardboard first, then cover it with 2 to 3 inches of mulch. Do not use shiny printed card, plastic sheet, salt, or vinegar. Salt can harm soil for a long time, and vinegar can burn nearby plants and small animals.
Leave a few quiet corners alone when they do not contain spreading weeds. A patch of fallen leaves under a shrub can hold beetles, worms, and food for birds. Tidy does not always mean healthy. The goal is a yard that has room for plants and wildlife together.
Start weed work at paths and lawn edges, then move toward habitat beds. This keeps pulled weeds and disturbed soil away from nests, cover plants, and feeding areas.
What is the best way to manage garden pests safely?
The best safe pest plan is to identify the pest, check the damage, and use the smallest direct action first. Hand removal, barriers, and plant care protect wildlife better than broad sprays, bait blocks, or glue traps.
Do not act because you see one bug. Look under leaves, on stems, and around the soil. Aphids may cover new growth, but ladybirds, lacewings, hoverflies, and small birds can eat them. If a plant has only a few curled leaves, wait two or three days and check again. Nature may already be doing the work.
Act sooner when young plants are losing most of their leaves, when a pest is spreading from plant to plant, or when food crops are at risk. Pick caterpillars, beetles, slugs, or snail eggs by hand when possible. Place them in a bucket and move them well away from tender plants, if local rules allow. For slugs, remove hiding spots close to seedlings and water in the morning.
Match the action to the pest
Use physical barriers before treatments. Fine insect netting can protect cabbage, kale, and other young crops from egg laying insects. Put netting over hoops or stakes so it does not rest on leaves. Check the edges for gaps, and remove it during flowering if pollinators need access.
For aphids, a gentle water spray can knock them from strong plants. Aim at the underside of leaves early in the morning. Repeat every few days if needed. Avoid spraying flowers where bees are feeding. Soap mixes can hurt soft bodied insects, including helpful ones, so they are not a first choice in a wildlife eco zone.
Skip rodent poison, slug pellets, and glue boards. These can harm birds, hedgehogs, frogs, pets, and helpful insects. A bird that eats a poisoned mouse can also become sick. The seasonal bird food guide can help you keep feeding areas separate from food gardens where you may be using netting or pest barriers.
Keep records of repeat problems. Write down the plant, pest, weather, and action you used. After a season, you may see a clear pattern, such as slugs after long wet weeks or aphids on one weak rose. That record helps you fix the cause instead of treating the same problem again.
Choose tools and timing for each eco zone
Choose quiet hand tools and simple barriers for areas close to wildlife. Work in short sessions during calm daylight hours, and avoid disturbing nests, feeding birds, or pollinators visiting open flowers.
Timing matters more than people think. Pulling weeds before seeds form can prevent hundreds of new plants later. Checking the underside of leaves once a week can stop a pest group before it reaches nearby plants. In everyday use, this check takes about five minutes for a small bed.
| Garden job | Best tool or setting | Wildlife safe check |
|---|---|---|
| Young weeds in mulch | Hand fork, 10 minute check twice weekly | Look for beetles, frogs, and ground nests first |
| Path cracks | Hand scraper and stiff brush | Keep soil and plant bits out of drains and water bowls |
| Aphids on leaves | Gentle water spray in early morning | Check for ladybirds and hoverfly larvae before spraying |
| Slugs near seedlings | Morning watering and hand picking after dusk | Do not use pellets near birds, frogs, or hedgehogs |
| Chewed food crops | Fine row cover on hoops | Remove cover when flowering plants need pollinators |
Use a broom, hand scraper, or boiling water with care for patio cracks, but keep hot water away from soil, roots, and wildlife. Never pour it near ponds, drains, or plant beds. For large hard surfaces, regular sweeping often prevents weed seeds from settling in the first place.
Check tools before you move between beds. Mud can carry weed seeds, snail eggs, or plant sickness from one area to another. Brush soil from boots and tool blades after working in a problem patch. A bucket of plain soapy water is useful for cleaning tools, but rinse tools away from ponds and water dishes.
Fix common planning slips before they harm wildlife
Fix common problems by slowing down, checking the cause, and changing one habit at a time. Most wildlife garden mistakes come from working too fast, clearing too much cover, or using a strong product for a small issue.
A common slip is removing every fallen leaf. Bare ground can dry out fast and leave small animals with no cover. Rake thick wet layers away from crowns of small plants, but leave leaves under shrubs or in a quiet corner. This gives insects a place to rest through cold weather.
Another slip is adding too much mulch. A thick pile against a trunk can trap moisture and damage bark. Keep mulch 2 inches away from stems and tree trunks. If you see mushrooms in mulch, do not panic. They often show that the wood material is breaking down, though you should remove any mushroom if a child or pet may eat it.
When pests keep returning
Repeat pest damage often means the first action did not reach the main cause. Check for crowded plants, poor watering, weak soil, or a nearby host plant. A row of stressed plants can attract pests again and again, even after you remove visible insects.
Try this reset for one problem area:
- Remove badly damaged leaves and place them in yard waste.
- Water roots deeply once, then let the top soil dry as needed.
- Add compost around, not against, plant stems.
- Give crowded plants more room or move them in the next planting season.
- Use a barrier before new growth appears.
Do not expect every leaf to look perfect. Small holes and chewed edges are part of a living garden. If the plant is still growing, flowering, or making food, it may not need action. A few insects are also food for birds and other wildlife.
Check your results through the seasons
Check plants, mulch, water areas, and wildlife activity each week, then adjust your plan by season. Good results mean fewer serious plant problems while birds, bees, insects, and small animals still use the yard.
Use a simple score from zero to three for each bed. Zero means no clear damage. One means minor damage that does not slow plant growth. Two means damage is spreading and needs a direct action. Three means the plant may fail unless you act soon. This stops you from treating every small mark as an emergency.
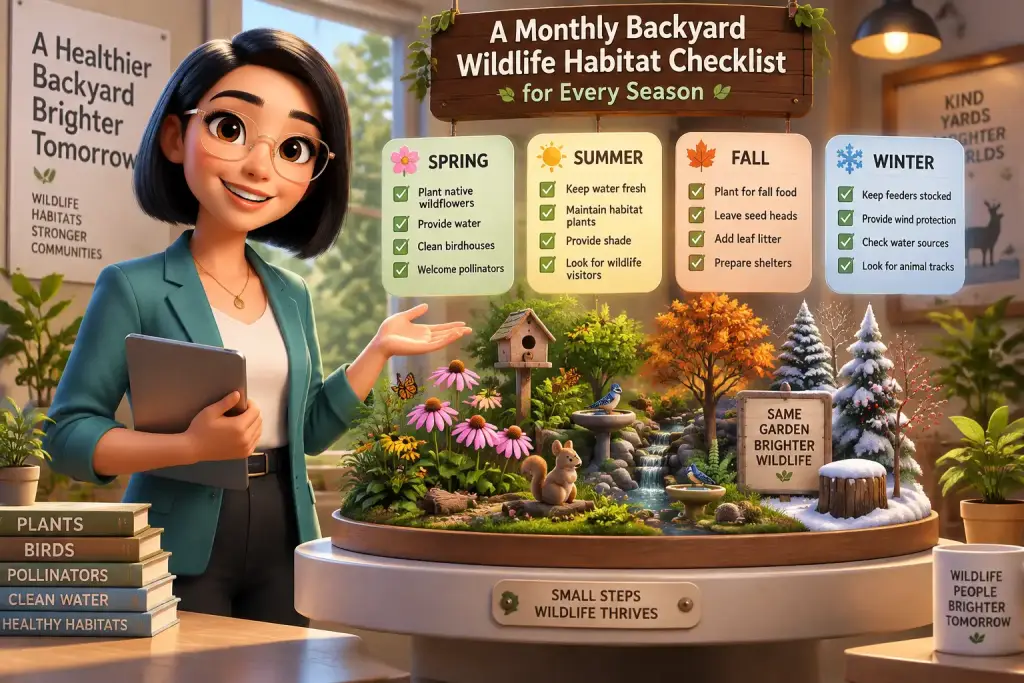
In spring, watch new shoots and pull weeds before they flower. In summer, check dry soil, aphids, caterpillars, and mulch depth. In autumn, cut seed heads from spreading weeds and leave some leaf cover. In winter, clean tools, plan new plant spacing, and look for places where water collects.
A monthly note makes this much easier. Use a calendar or the wildlife habitat checklist to record what changed. Write down bird visits, bee activity, plant damage, and weather. After a few months, you will know which beds need more mulch, which plants need more space, and where wildlife feels safe.
The best sign of success is balance, not a spotless yard. You may still see weeds, chewed leaves, and insects. Yet your wanted plants should have room to grow, water should stay clean, and wildlife should keep returning. That is a practical, kind way to care for a backyard eco zone.

Ludovica Serra
Founder & Habitat EditorLudovica Serra, born and based in Roma, Italy, is the founder and lead editor of Eco Zoned. She helps readers create wildlife-friendly garden spaces with practical, clear advice on planting, shelter, water, and everyday habitat care.