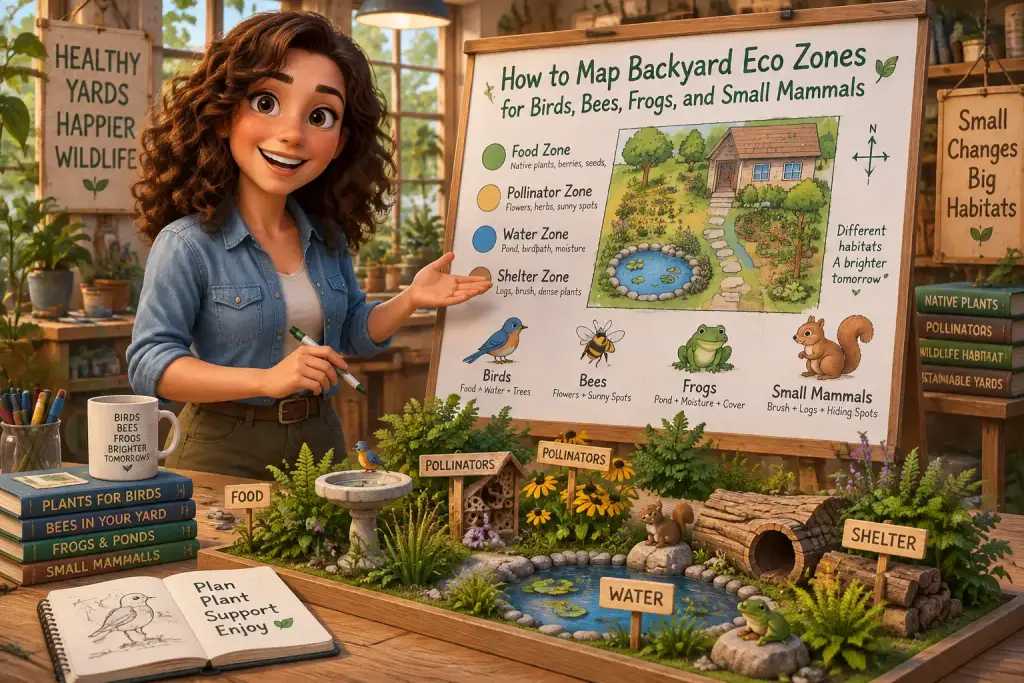










A sunny corner can become a busy food stop for insects with a little planning. A pollinator eco zone uses flowers that open at different times, plus water and safe resting places, so bees, hoverflies, butterflies, and moths can visit from spring to autumn. You do not need a large garden. A two metre bed, a few pots, or a strip beside a fence can make a useful start.
- Plant early, summer, and late flowering groups so there is less chance of an empty food period.
- Put nectar flowers, a shallow water dish, and safe cover close together in a sunny spot.
- Leave some seed heads and bare soil through winter to help insects rest and nest.
Table of Contents
Start Your Pollinator Eco Zone in Five Minutes
Start by marking the sunniest patch and placing one shallow water dish with stones there. A pollinator eco zone works best when flowers, water, and cover sit close together, so insects spend less energy searching and more time feeding.
Walk outside at three times in one day if you can, morning, noon, and late afternoon. Notice where direct sun stays the longest. Most flowering plants need around six hours of sun for strong blooms, though some spring plants can cope with light shade. Pick a space away from heavy foot traffic, where you can watch without standing over insects. A corner by a shed wall, a fence, or a patio edge often works well.
Make one small safe stop
Put a saucer or low bowl on the ground and add clean pebbles, twigs, or cork pieces. The water should be very shallow, about one centimetre deep. Bees can land on the stones and drink without falling in. Change the water every two or three days in warm weather. This small job takes less than five minutes, yet it can help during dry weeks when puddles disappear.
Do not clear every leaf or stick from the area. Leave one quiet patch with dry stems, a little leaf cover, and some open soil. Some bees nest in hollow stems, while others make small holes in bare ground. Keep this spot free from weed killer and bug spray. A tidy garden may look neat, but a little safe mess gives wildlife more places to live.
Which Flowers Keep Pollinators Fed From Spring to Autumn?
Choose at least three flower groups, early, summer, and late. This gives bees, hoverflies, butterflies, and moths food from the first warm weeks until cold weather, even when one type of flower finishes blooming in your yard.
Start with flowers that open early, because food can be hard to find after winter. Crocus, lungwort, grape hyacinth, flowering currant, and fruit tree blossom can help at this time. If you have room for a shrub, flowering currant is useful because it gives many small blooms in one place. Keep in mind that spring dates change with your local weather, so watch your garden instead of relying only on a calendar.
Use three bloom groups
- Spring: Crocus, lungwort, flowering currant, apple blossom, and native wildflowers for your area.
- Summer: Borage, lavender, catmint, coneflower, bee balm, and open flowered herbs.
- Autumn: Asters, sedum, goldenrod, ice plant, and late flowering native plants.
Summer flowers should make up the biggest group, because warm months bring more insect activity. Borage is a good example for a beginner because it grows fast from seed and keeps making blue flowers. Lavender and catmint can give a longer display, but they need good drainage and should not sit in wet soil. Open flowers are often easier for smaller insects to use than very full, double flowers with packed petals.
Finish with late flowers that stay open into autumn. Asters and sedum are good choices because they often bloom when summer plants are slowing down. Goldenrod can be helpful in suitable places, but choose a type that suits your area and does not spread where it is unwanted. Use native plants where possible, since local insects often know how to use them. Ask a local garden group or native plant guide which choices fit your soil and climate.
Build a Bloom Calendar Before You Buy Plants
Make a simple month by month list before buying plants. It shows empty food periods in your flower plan and stops you from filling a bed with plants that all bloom for only two weeks.
Take a sheet of paper and write March through October down one side. Then add each plant beside the months when it normally flowers in your area. Plant labels give a rough guide, but your own notes become more useful after one full year. A warm wall can bring flowers out early, while a shady bed may bloom later. Look at it this way: you are not trying to create a perfect flower show. You are trying to keep food available when insects need it.
| Flower period | Useful plant examples | Small care habit |
|---|---|---|
| Early spring | Crocus, lungwort, flowering currant | Leave early blooms untouched until flowers fade |
| Late spring | Apple blossom, chives, native wildflowers | Water new plants once a week if rain is low |
| Summer | Borage, lavender, catmint, coneflower | Cut only spent flowers that no longer feed insects |
| Early autumn | Asters, sedum, goldenrod | Keep the water dish filled during dry days |
Plan for clumps instead of single plants spread far apart. Three to five plants of one kind make a clearer food patch, and insects can move between flowers with less effort. In a small bed, use one early plant, two summer plants, and one autumn plant. In pots, try borage in one pot, lavender in another, and aster in a third. This is easier to manage than buying ten different plants at once.
When we tested this setup in a small sunny plot, the planning stage took about twenty minutes. It saved much more time later because the missing bloom periods were easy to spot. If June has no flowers on your list, you know exactly what to add. A simple paper chart also helps you avoid buying the same type of summer flower again and again.
Plant in Layers and Give Insects Safe Places
Put taller flowers at the back, medium plants in the middle, and low flowers near the front. Add bare soil, dry stems, and a small log nearby, because feeding flowers work better when insects also have places to rest and nest.
A layered bed makes good use of a small space. Place tall plants such as coneflower, asters, or flowering shrubs against a fence. Put catmint, lavender, and sedum in front of them. Low plants such as thyme, ajuga, or small native flowers can fill the edge. This shape lets sunlight reach more leaves and gives you a clear view of what is blooming.
Leave room for nesting
Keep one patch of soil open and sunny, about the size of a dinner plate or larger. Do not cover it with thick mulch. Some ground nesting bees may use this bare soil, especially if it stays dry. Place a few hollow stems upright in a quiet corner, but do not feel you must buy a bee hotel. Natural places, such as stems, logs, and small gaps in old wood, are often enough.
Think about other wildlife as you build the bed. A low pile of sticks can shelter beetles and toads, while plants along a fence may give small birds cover. Keep sharp netting, deep water tubs, and loose plastic away from the zone. Our guide to safer backyard wildlife can help you check for risks close to the ground.
Do not use weed killer or bug spray in the flower area. Even products sold for home use can harm insects directly or remove the plants they need. Pull small weeds by hand after rain, when roots come out more easily. If aphids appear, wait a few days before acting. Ladybirds, hoverfly young, and small birds may reduce them without your help.
Write down every flower's bloom month before you buy it. If two months have no flowers, add one native plant or flowering herb for that gap.
How Should You Water, Weed, and Watch the Zone?
Water new plants deeply once or twice a week during dry weather, pull weeds before they seed, and watch from a short distance. Small regular checks keep flowers healthy without disturbing feeding insects or removing their shelter.
Watering is most useful during the first growing season, while roots are still spreading. Give plants a slow soak at soil level instead of spraying the flowers. Early morning is a good time because leaves can dry after watering. Once plants are settled, many native flowers and drought tolerant herbs need less help, though pots dry out much faster than garden beds.
Day to day, take one minute to look for dry soil, empty water dishes, broken stems, or weeds growing over young plants. Pull weeds when they are small. Cut back only flowers that have finished and look tired, and leave some stems later in the year. Seed heads can feed birds, while hollow stems can hold sleeping insects through winter.
Watch quietly from a few steps away. You may see bumblebees working one flower type, hoverflies resting on leaves, or butterflies taking nectar in the afternoon sun. Avoid moving stones, opening soil, or cutting stems just to get a closer look. Use these simple habits with a wildlife watching guide if you want to enjoy visits without causing stress.
Keep a short note on your phone or a paper pad. Write down the first flower seen each month and the insects that visit it. You do not need to name every insect. Notes such as “small bee on borage” or “butterfly on aster” are enough. After a season, these notes show which plants are doing real work in your yard.
Keep the Flower Cycle Going Year After Year
Keep the best plants, fill bloom gaps, and avoid cutting everything down in autumn. A pollinator patch becomes stronger over time when you let healthy plants grow, divide crowded clumps, and add one useful flower each year.
At the end of the flowering season, look back at your bloom calendar. Mark plants that flowered for a long time and attracted regular visitors. Keep those. Mark weak plants that struggled with shade, wet soil, or poor drainage, then move or replace them in the next planting season. There is no need to force a plant to grow where it clearly does not like the conditions.
Leave most dry stems standing through winter if they are safe to leave. They protect sleeping insects from rain and cold. In spring, cut old stems back in stages, not all in one day. Put some cut stems in a loose pile at the back of the bed. This gives insects time to leave and keeps useful cover nearby.
Divide large clumps of sedum, asters, or catmint every few years if the middle becomes thin or bare. Share extra pieces with a neighbour or move them into a new gap. Add one or two plants each season instead of changing the whole bed. This slow method costs less, gives you time to see what works, and keeps food available while new plants settle.
A quick monthly check makes the work easier to remember. Use a seasonal habitat checklist to match jobs to the time of year, from filling water dishes in summer to leaving stems in winter. Small steps add up. By next spring, your flower patch can be more than a pretty corner. It can be a steady place for wildlife to eat, drink, rest, and return.

Ludovica Serra
Founder & Habitat EditorLudovica Serra, born and based in Roma, Italy, is the founder and lead editor of Eco Zoned. She helps readers create wildlife-friendly garden spaces with practical, clear advice on planting, shelter, water, and everyday habitat care.